
Table of Contents
- Why Graphic Tees Crack and How to Prevent It
- Identify Your Print Type First
- How to Wash Screen Printed Shirts the Right Way
- Air Drying vs Machine Drying Graphic Tees
- How to Stop Cotton Shirts Shrinking and Distorting Prints
- Detergent Chemistry and Water Hardness: What Actually Matters
- Can You Fix Cracks Once They Appear?
- Build a Care Routine That Extends Print Life
- Frequently Asked Questions
Last Updated: September 6, 2026
Why Graphic Tees Crack and How to Prevent It
Print cracking happens when the ink layer loses flexibility and can no longer bend with the fabric, resulting in fine white lines spidering across your design after a few washes.
Preventing graphic tee cracking comes down to a handful of wash and dry habits. Preventing graphic tee cracking comes down to a handful of wash and dry habits. Even the best print will fail if the garment care is wrong.
Below is the exact routine that keeps DTG prints looking fresh, starting with knowing what kind of print you own.
Identify Your Print Type First
Flip the shirt inside out and look at the back of the design. The print method determines how much abuse the graphic can take.
Screen Print vs. DTG vs. Heat Transfer
Screen printing pushes thick ink through a mesh stencil, creating a durable layer on top of the fabric. DTG printing sprays water-based ink directly into the fibers, leaving a softer feel that flexes with the cotton. Heat transfer uses a plastic film pressed onto the shirt and is the most prone to cracking because the layer sits on the surface with little penetration.
| Print Type | Feel | Crack Resistance | Best Care |
|---|---|---|---|
| Screen Print | Slightly raised | High | Cold wash, inside out |
| DTG | Soft, no texture | High | Cold wash, inside out, air dry |
| Heat Transfer | Plastic-like film | Low | Hand wash, air dry only |
How to Wash Screen Printed Shirts the Right Way
Turn the shirt inside out before it goes near the water. This single habit is the most effective way to prevent cracking because it stops the print from rubbing directly against other clothes.
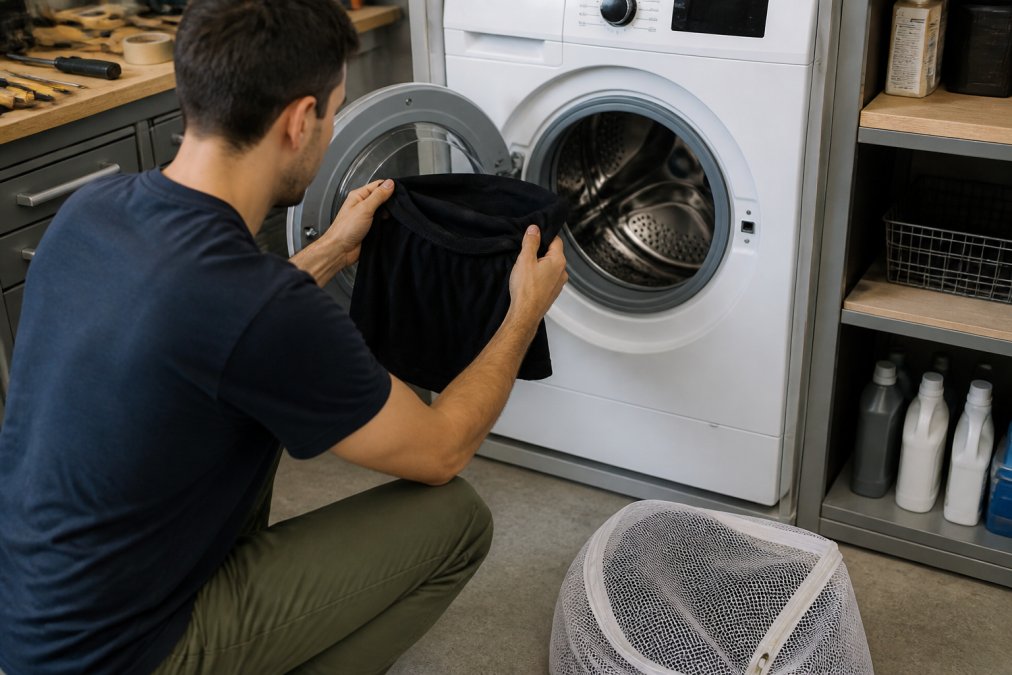
The friction and agitation of a wash cycle breaks down the ink binder over time. Washing inside out puts the cotton layer between the print and the drum, absorbing most of that abuse.
Inside Out, Cold Water, and the Delicate Cycle
Set your machine to the cold water cycle, below 85 degrees Fahrenheit (energy.gov). Hot water softens the ink binder and makes it lift away from the fabric fibers. Use the delicate cycle to reduce spin speed and agitation time.
A mesh laundry bag adds another layer of protection. Place the folded shirt inside a fine-mesh bag to keep it separated from zippers, buttons, and rough denim that can scrape the print surface.
The Mechanics of Friction and Abrasion
The damage isn't just from water temperature; it's from physical forces inside the drum. During a normal cycle, a cotton t-shirt experiences hundreds of flexes and rubs against adjacent garments, each acting like fine sandpaper on the print. Over time, this micro-abrasion weakens the ink's top layer, creating microscopic stress points that become visible cracks when the shirt stretches during wear.
A front-loading washer is gentler than a top-loader with a central agitator, whose twisting motion wrings the fabric. If you have a top-loader, the mesh bag is not optional, it is the primary defense against the agitator's mechanical force.
Choosing the Right Cycle and Spin Speed
The "delicate" or "hand wash" cycle reduces wash time from roughly 30 minutes to 15 minutes and cuts spin speed from 800+ RPM to around 400 RPM, meaning less centrifugal force and less stress on the print.
Avoid the "heavy duty" or "whites" cycle entirely, these use longer agitation and hotter water, a one-way ticket to premature cracking.
The Role of Load Size
Overloading the washer increases friction because clothes are pressed tightly together. Keep the load at about 75% of the drum's capacity so each shirt has enough space to tumble without being crushed.
A Step-by-Step Wash Routine
For the best results, follow this sequence every time:
- Pre-treat stains on the inside of the shirt, never directly on the print.
- Turn the shirt inside out and zip any zippers on other garments in the load.
- Place the shirt in a fine-mesh laundry bag.
- Select the cold water cycle (below 85°F) and the delicate setting.
- Add a mild, dye-free detergent, use half the recommended amount if your load is small.
- Run the cycle and remove the shirt promptly when it finishes.
This routine takes less than a minute of extra effort but addresses every mechanical and thermal factor that leads to cracking.
Air Drying vs Machine Drying Graphic Tees
Air drying is the single best thing you can do for a graphic tee. The heat of a tumble dryer does more damage in twenty minutes than a hundred cold water washes.
Tumble drying softens the ink while the tumbling motion bends the fabric, exactly how cracks form. If you must use a dryer, run it on the lowest heat setting and pull the shirt out while still slightly damp.
Lay the shirt flat on a drying rack or hang it by the bottom hem. Never use a hanger through the neckline while the shirt is wet, because the weight of the water will stretch the cotton and distort the print.
How to Stop Cotton Shirts Shrinking and Distorting Prints
Shrinkage is the hidden enemy of graphic tees because it changes the spacing of the fabric fibers underneath the print. When cotton shrinks, the fibers pull tighter and the ink layer, which does not shrink, starts to buckle and crack.
Washing in cold water and air drying are the two most effective ways to stop cotton shirts shrinking. Heat is what causes the cotton fibers to contract, so removing heat from the equation keeps the shirt true to size.
The fabric blend matters too. A 100% cotton shirt will shrink more than a cotton blend with synthetic fibers like polyester, which hold their shape under heat (extension.iastate.edu). If you are buying new tees, look for pre-shrunk cotton or ring-spun cotton, which reduces shrinkage significantly.
Detergent Chemistry and Water Hardness: What Actually Matters
The chemistry of your detergent directly affects how long your print lasts. Harsh chemicals and bleach break down the ink binder, the polymer that holds the pigment together and keeps it flexible.
Skip anything with chlorine bleach, optical brighteners, or strong enzymes, they attack the binders in screen print and DTG inks. A mild, dye-free detergent is the safest choice.
Hard water contains calcium and magnesium, which leave mineral deposits that interfere with the print's bond to the fibers. Fabric softener coats cotton fibers with a waxy layer between the fabric and ink, weakening the bond. Skip the softener on graphic tees entirely.
Can You Fix Cracks Once They Appear?
Once cracking starts, you cannot fully reverse it, but you can stop it from getting worse. A cracked print has lost its protective top layer, and every subsequent wash will peel away more of the design.
For minor surface crazing, try ironing the shirt inside out on low with a pressing cloth. The heat can reflow the ink slightly, but this is temporary and risks further damage if the iron is too hot.
A better approach is to treat a cracked shirt as a casual at-home piece and hand wash it in cold water, preventing the damage from spreading. When the print flakes off in chunks, the shirt has reached the end of its life.
The Unique Angle: Stabilizing and Restoring Cracked Prints
If you already have a favorite tee with fine lines, you cannot make the cracks disappear entirely, but you can stabilize the print, reduce their visibility, and extend the shirt's life by several months.
Step 1: Assess the Damage
Hold the shirt up to a light source and examine the print closely. There are two types of damage:
- Surface crazing: Fine, hairline cracks that are visible but the ink is still fully intact and smooth to the touch.
- Flaking: Chunks of ink that are lifting or peeling away from the fabric, leaving bare cotton visible.
Surface crazing can be improved. Flaking cannot be reversed, once the ink has separated from the fibers, no heat or adhesive will re-bond it effectively.
Step 2: The Heat-Press Stabilization Method
For surface crazing, a household iron can slightly reflow the ink binder and close the finest cracks. The binder in most screen print and DTG inks is a polymer that softens at around 250°F to 300°F (peer-reviewed research). The key is to apply heat evenly without melting the design or scorching the fabric.
What you need:
- A dry iron (no steam)
- A piece of parchment paper or a thin cotton pressing cloth
- A hard, flat surface (an ironing board works, but a table covered with a towel is better)
The process:
- Turn the shirt inside out. This is critical, you want the heat to penetrate through the cotton to the back of the print, not directly onto the front surface.
- Place the pressing cloth over the inside of the print area.
- Set the iron to medium-low heat (no steam, no water in the tank). If your iron has a dial, set it to the "synthetic" or "silk" setting, which is typically around 250°F.
- Press the iron down firmly on the area for 10 to 15 seconds. Do not slide the iron back and forth, sliding can stretch the fabric and distort the print. Use a straight up-and-down pressing motion.
- Lift the iron and let the area cool completely for at least 30 seconds before moving the shirt. The cooling phase is what allows the polymer to re-harden in its new, slightly relaxed state.
- Repeat on any other cracked areas, moving the shirt as needed.
The result: The heat softens the binder just enough to let the finest cracks close up. This will not fix deep cracks or missing ink, but it will reduce the visibility of light crazing and make the surface smoother, which slows down future flaking.
Step 3: Seal the Surface with a Clear Coat (Optional)
For a more durable fix, you can apply a fabric-safe clear coat designed for textiles. Products like Jacquard Textile Color Fixative or similar fabric sealants are available at most craft stores. These are not the same as spray-on fabric protectors, they are designed to bond with ink and create a flexible top layer.
Application tips:
- Apply a thin, even layer over the entire print, not just the cracked areas.
- Let it dry completely for 24 hours before washing.
- After it dries, turn the shirt inside out and iron it on low heat for 10 seconds to cure the sealant.
This adds a protective barrier that reduces friction against the print during future washes. It is not a permanent solution, but it can add 10 to 15 extra washes to a shirt that would otherwise be relegated to the rag pile.
Step 4: Adjust Your Care Routine for Damaged Prints
Once a print has cracked, it is more vulnerable than a new one. The protective top layer is compromised, so you need to be even more careful:
- Hand wash only in cold water with a mild detergent.
- Never wring or twist the shirt to remove water, press it gently between two towels.
- Air dry flat, never in the dryer.
- Store folded, not on a hanger, to avoid stretching the fabric around the cracked areas.
When to Give Up and Replace
If the print is flaking off in chunks, or if the cracks are so deep that you can feel them with your fingernail, no fix will save it. At that point, the ink has lost its bond with the fabric, and every wash will accelerate the loss. The best move is to repurpose the shirt as a sleep shirt or gym rag, and invest in a new tee with a print method that lasts longer.
Build a Care Routine That Extends Print Life
The difference between a tee that lasts five washes and one that lasts fifty comes down to routine, not luck:
- Turn the shirt inside out before washing
- Place it in a mesh laundry bag
- Wash on the cold water cycle with the delicate setting
- Use a mild, dye-free detergent with no bleach
- Skip the fabric softener completely
- Air dry flat, never tumble dry
- Iron inside out only if absolutely necessary
This routine takes thirty seconds of extra effort per load for a wardrobe of graphic tees that keep their color and shape, wash after wash.
Print longevity starts before the first wash. A shirt printed on high-quality, DTG-optimized fabric will outlast one printed on rough, low-grade cotton. We use soft ring-spun cotton that gives the ink a smooth surface to bond with and a comfortable feel that holds up to frequent washing.
Caring for graphic tees requires breaking a few bad habits. Hot water, harsh detergents, and the dryer are the three biggest threats to your prints. Start with a quality DTG-printed tee on premium fabric, then protect that investment with a cold wash and an air dry. Shop the collection and put these care habits to work on a tee built to last.
Frequently Asked Questions
How do I fix a cracked graphic tee?
Once a print cracks, you cannot fully restore the original design. For small cracks, you can use a fabric paint marker that matches the design color to fill in the exposed lines, but the repair will be visible. A better approach is to prevent further damage by washing the shirt inside out in cold water and air drying it. For DTG prints with extensive cracking, consider printing a replacement shirt if the design is still available.
Is it better to wash graphic tees inside out?
Yes, washing graphic tees inside out is one of the most effective ways to prevent cracking. Turning the shirt inside out places the print on the inside, shielding it from the direct friction and agitation of the wash drum. The fabric, not the ink, absorbs the abrasion from other clothes. This simple step protects both screen printed and DTG prints from the wear that leads to cracking and fading.
What causes t-shirt prints to crack?
Print cracking happens when the ink binder loses flexibility. The main causes are heat damage from hot water or a high-heat dryer, and mechanical stress from friction against other garments during the wash cycle. Fabric softeners and harsh chemicals like bleach also break down the binder over time. Using cold water, a gentle cycle, and air drying preserves the print's flexibility and prevents graphic tees from cracking.
Does heat cause graphic tees to crack?
Heat is a primary cause of graphic tee cracking. Hot water in the wash and the high heat of a tumble dryer both degrade the ink binder, making the print stiff and brittle. Once the binder loses flexibility, normal movement of the cotton fabric causes the ink to crack. Always wash in cold water and choose air drying or the lowest heat setting on your dryer to keep the print flexible.